Back in the day, when I was beginning to work on public-facing projects, setting up a development environment was really tedious. You have to install all the required software’s on the host machine. Relocating a project from one host to another sometimes comes to be the real work.
Now, the trend seems to have been changed. Once you want to work on a project, you start setting up a virtual machine on a remote computer that your company provides or a local virtual machine (at least in my company people prefer to work on virtual machines). There are many benefits, but one that I use all the time is the ability to take a virtual machine from one host and run it on a different one. Other than that, the ability to have multiple operating systems is very valuable for both development and testing.
In my company, we use the Windows systems for development purposes, but the client we are working for uses a Linux machine, which brought some unprecedented issues (since we are working on different platforms, every time we have to test for both environments). So as to align ourselves, we had to dedicate a full Linux server with Centos 7 and different application and web servers. While running some applications, we had a low response time and sometimes the complete death of some applications. Which finally led us to containerization.
There are many alternatives, even though we choose Docker. Docker is container technology with most public traction and is almost a de facto container standard right now. Docker containers wrap a piece of software in a complete file system that contains everything needed to run: code, system tools, system libraries and so on. This guarantees that the software will always run the same, regardless of its environment (host operating system).
In this post, I don’t go in details about how Docker works. I assume that you have it installed and have basic knowledge on how it works. I will try to cover how to edit and commit on a running image when we have to install/update configurations and/or software.
By default, once an image is created, it will stay as it is unless we commit new changes.
I start by downloading a Tomcat image from the official distribution (check on Dockerhub) and add a user to manage it so as to show how to do something very basic.
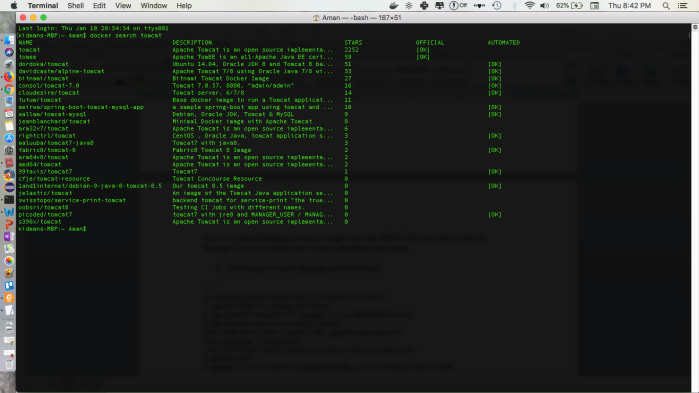
Search for the image using image search command: $docker search tomcat
Pull the image you prefer ($docker pull tomcat). This pulls the latest available image.

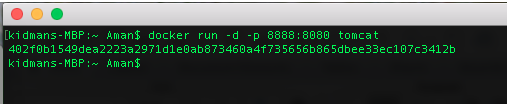
Once the download has finished, run the container instance with:
$docker run -d -p 8888:8080 tomcat
where,
- –d tells Docker to run the container in a daemon mode (in the background so that we can use our terminal window without the need to open a new one)
- –p tells what port on the docker image(8080) should be accessed from the host and on what port(8888) . Running this command will give us something similar to:
Now we have Tomcat up and running on http://localhost:8888/ but we are still unable to login through the management-gui to manage the server. Let’s add a user to be able to do so.
docker exec -it {container} bash
You can change this if you need. Also, note the image-name and tag can be any name you like.

Now you have a new image with everything from the previous one plus your setting. Note that if you exit the container before commit all the changes will be lost.
Try to run the new image and check if you can login the management-gui with the user created, use command:
docker run -d -p 8888:8080 tomcat:custom
Note: After adding a user to Tomcat, if 403 Access Denied is not resolved, try changing the following in webapps/manager/META-INF/context.xml and commit again (you can use the same image-name:tag to overwrite the previous) :
<Context privileged=”true”>
<!– <Valve className=”org.apache.catalina.valves.RemoteAddrValve” allow=”127.0.0.1″/> –>
</Context>


